Latte Art
Ingredients
- Barista milk
- Coffee
Step by Step
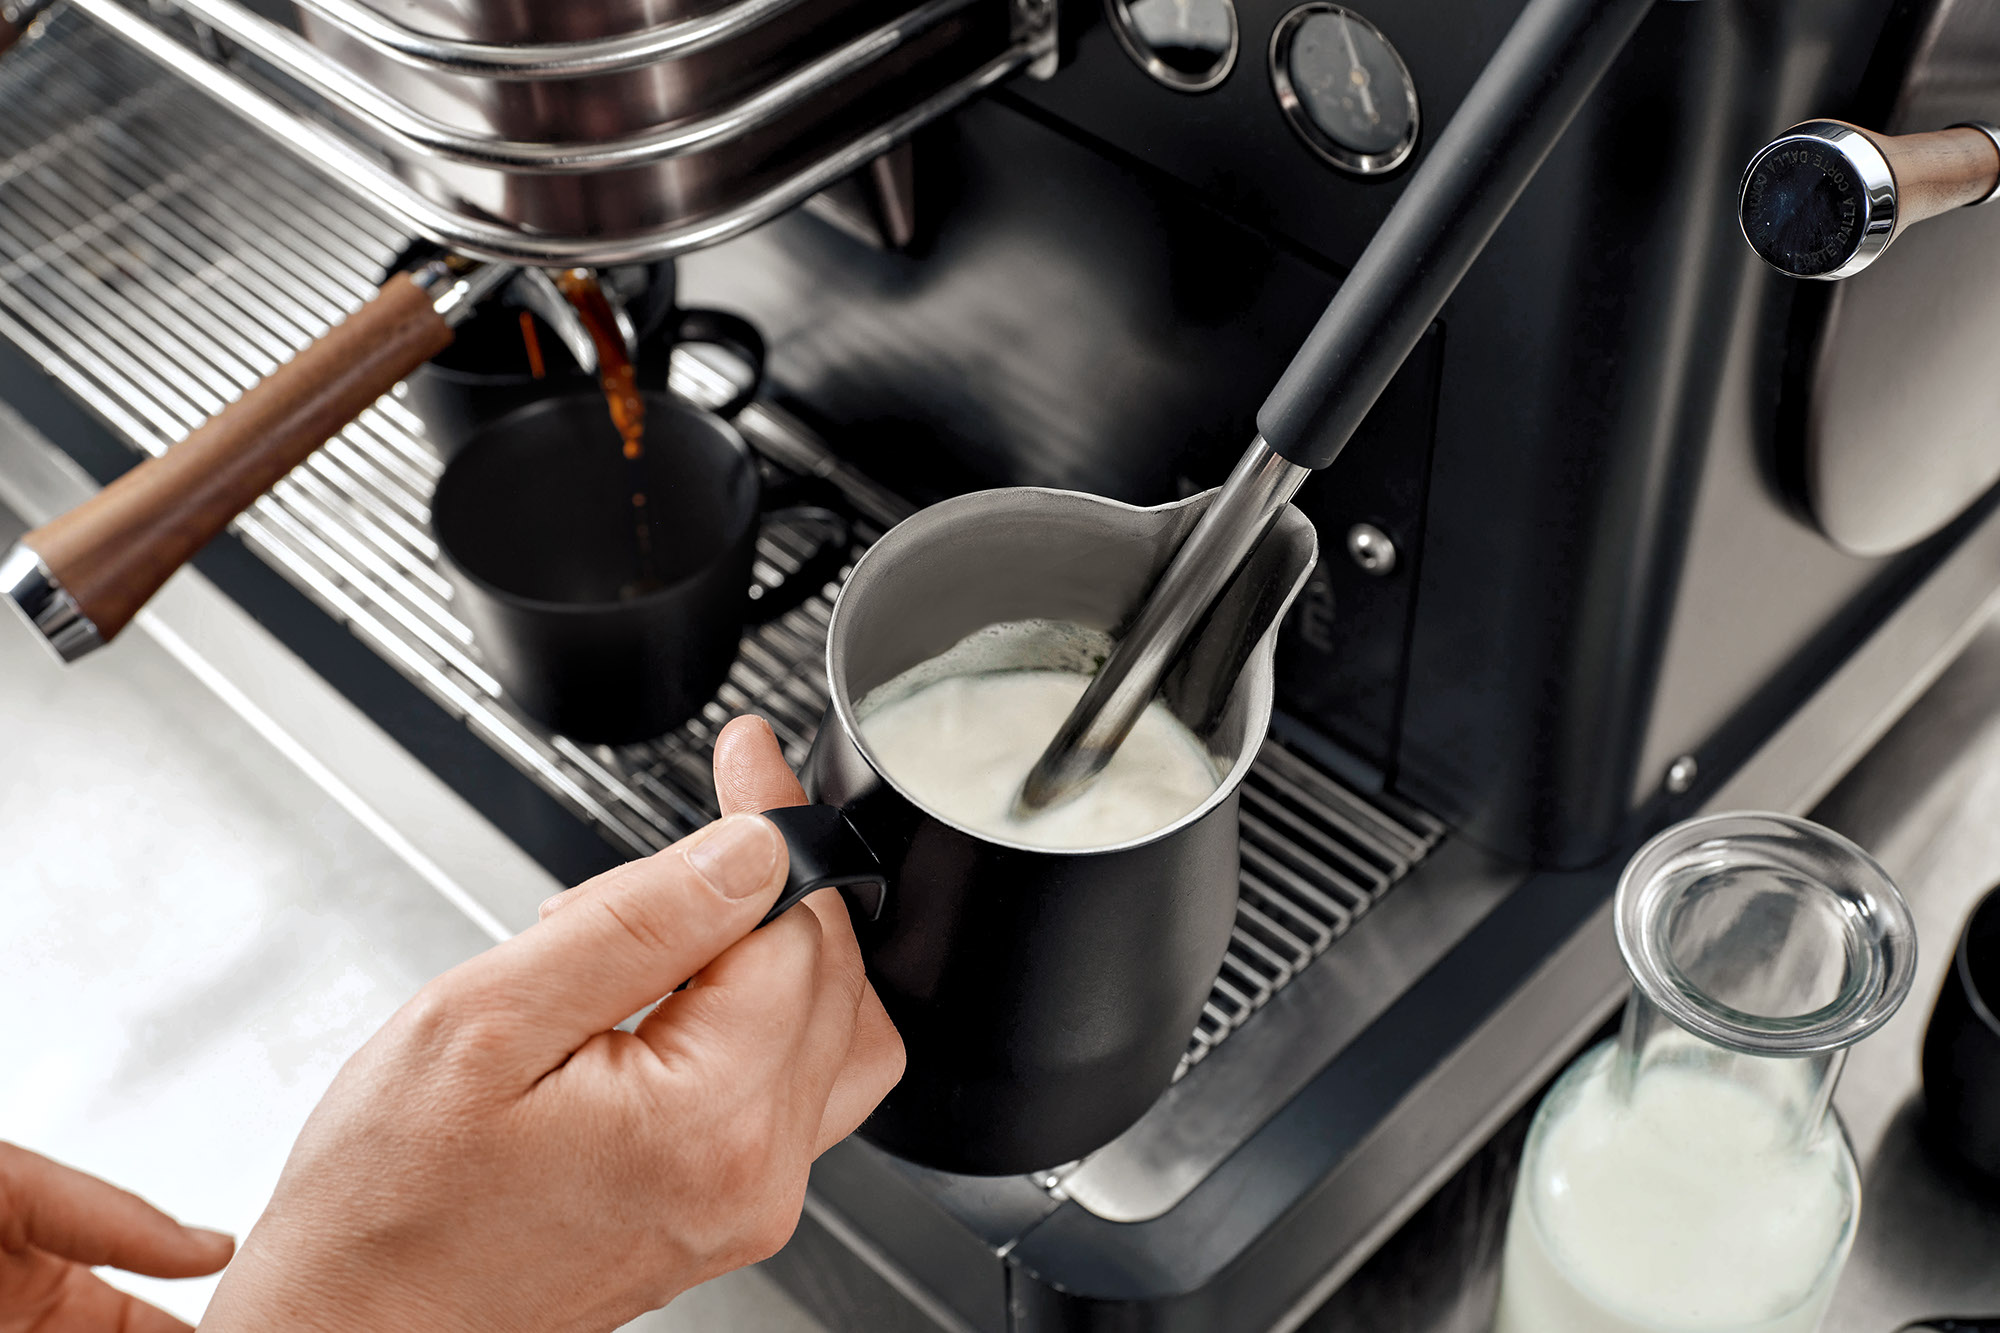
01
Foaming & foam quality: Prepare an espresso.
At the same time, fill the milk pitcher, position the
steam wand just under the surface, open the steam
valve fully and heat the milk. While doing so, use the
steam tip on the surface of the milk for 2–3 seconds
to work microbubbles of air into the milk, so as to
increase the volume slightly (minimum “stretching
phase”), then immerse the steam wand completely
in the milk and allow to roll (“rolling phase”).

02
Pouring: Gently swirl the microfoam briefly in the
pitcher and, from a height initially, pour vertically
in a thin stream, allowing the milk to hit the surface
and sink under the coffee. Fill the cup 50–80%.
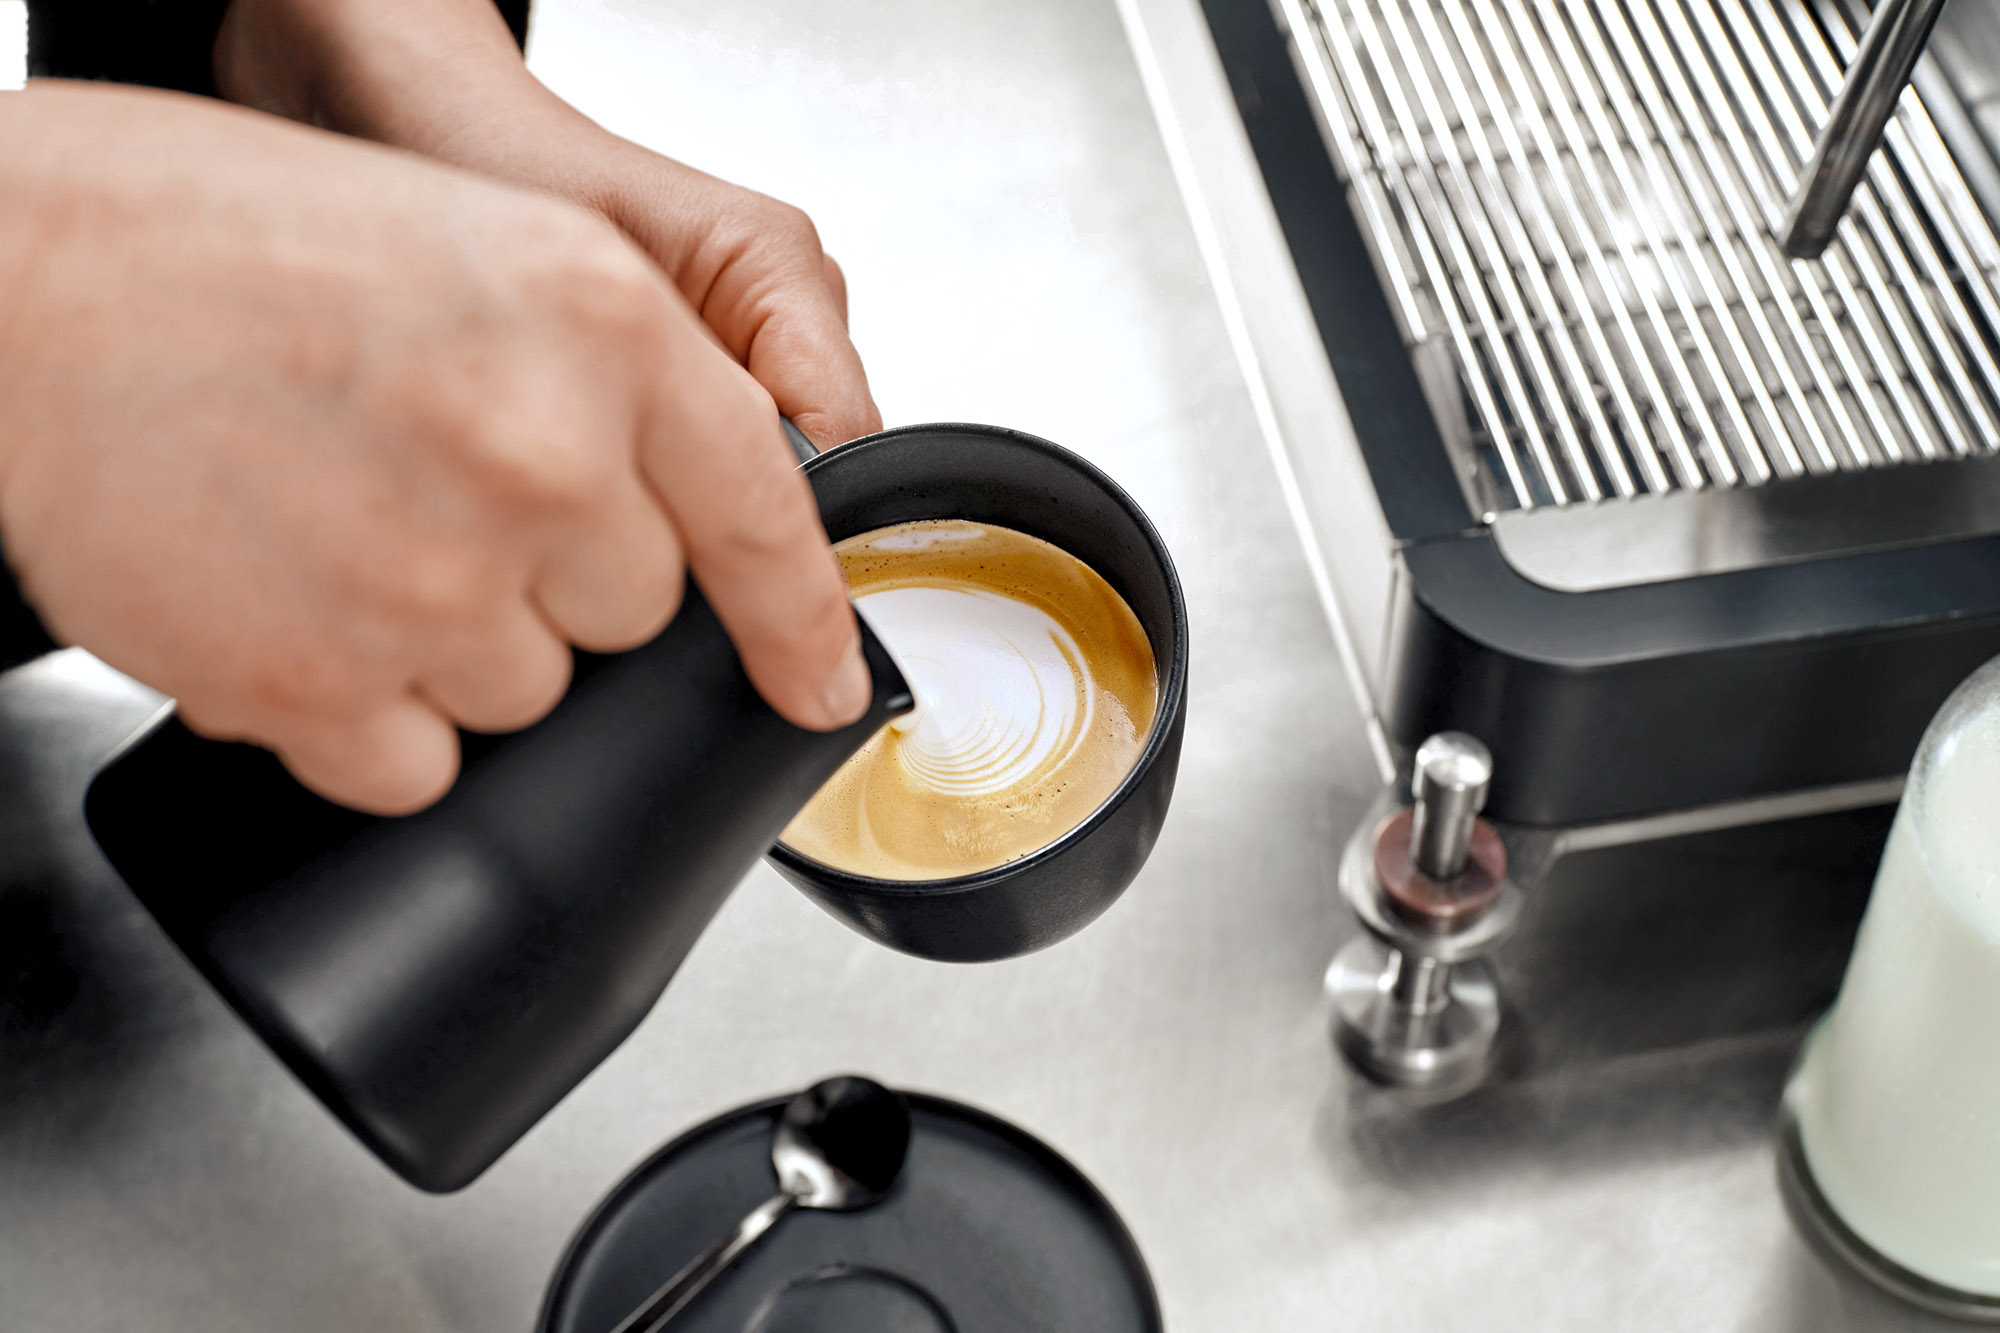
03
Latte art: Holding the cup at an angle, place the spout of the pitcher in the centre at approx. 45° and allow the milk foam to flow over the coffee with controlled motions.
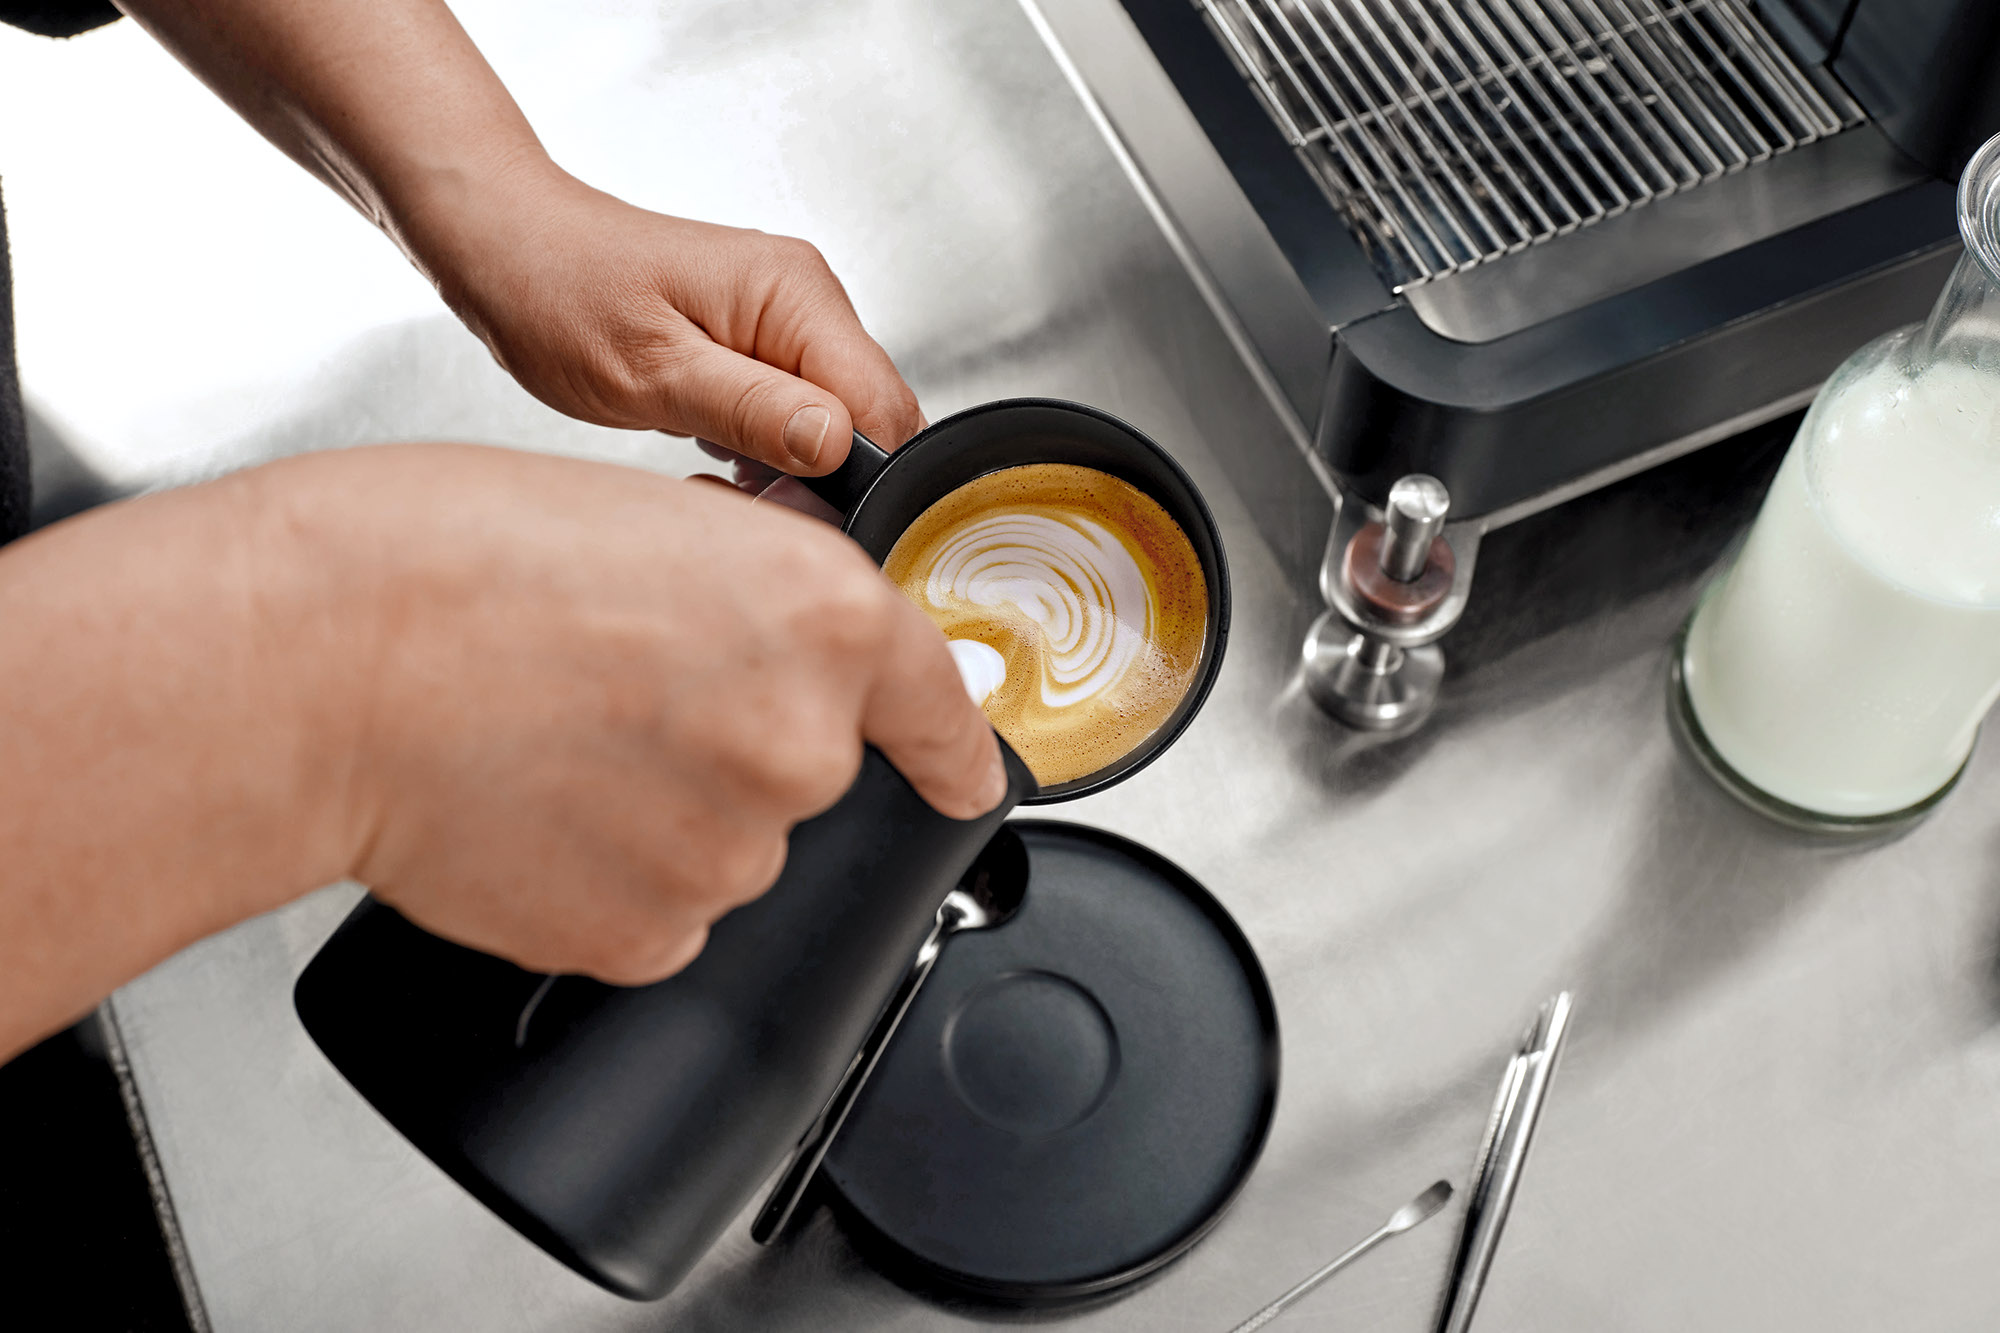
04
Multi-part latte art: For multi-part designs, start
as often as necessary in the centre of the cup leaving
a small gap between the poured elements and
connect them with a sweeping hand motion towards
the side of the cup.
05
Basic techniques for latte art: Designs covering
a large surface area are produced by flat pouring
without moving the spout; lines require a quicker,
steeper stream and movement of the pitcher to and
fro as necessary (e.g., the tip of the heart design).

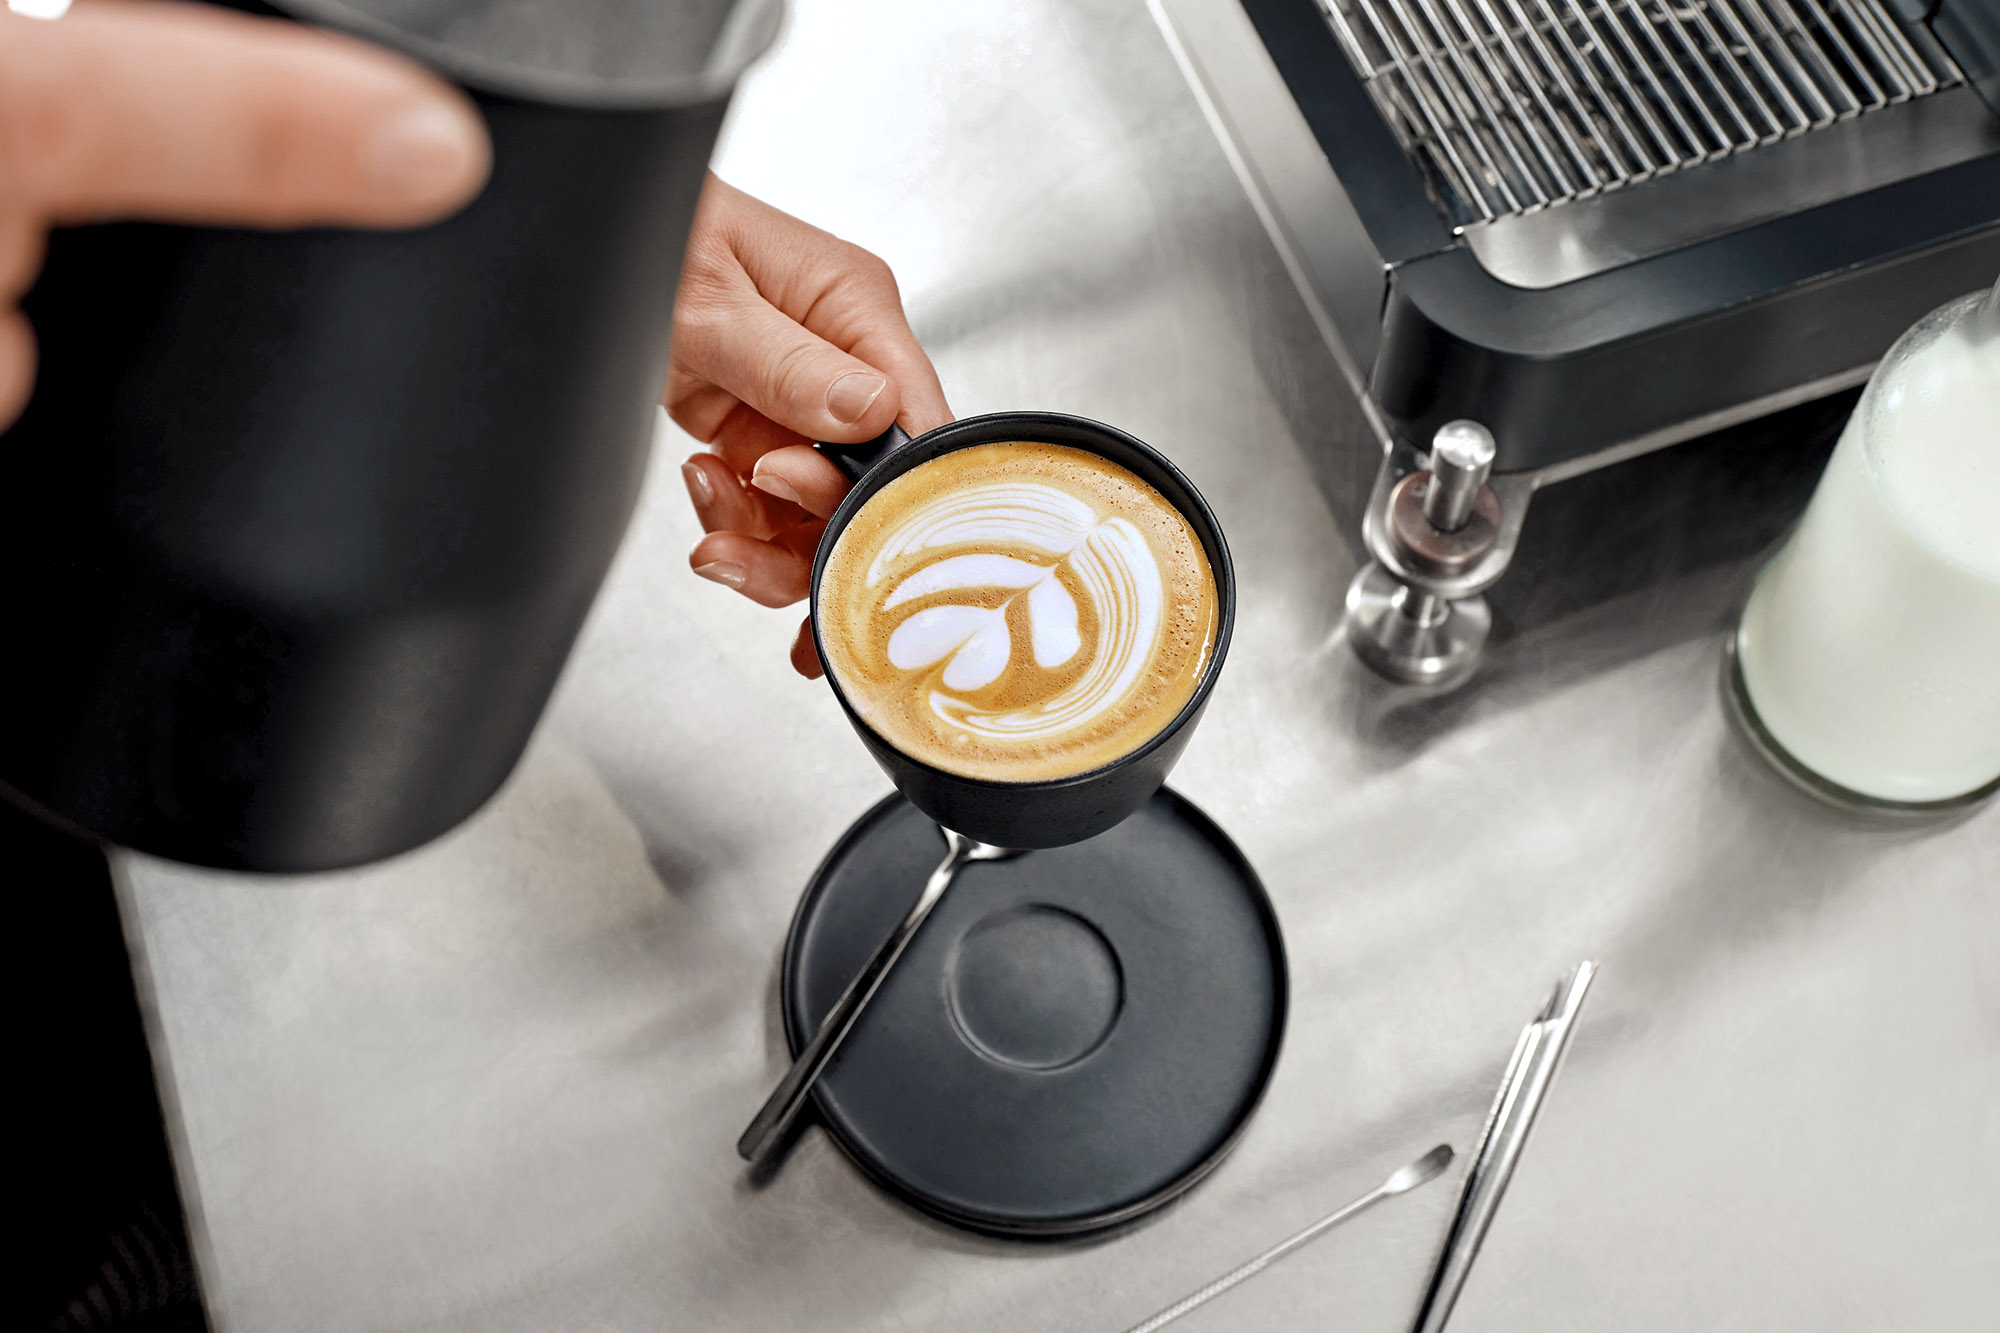
06
Serving: Impress guests with new and customised designs every time.
Recommended Products

Oldenburger Barista Milk 1.0% fat, UHT, 1l
- for hot & cold drinks
- ideal for Latte art
- great stability
- from pure cow‘s milk